A year and a day

It’s been a year and one day since I last blogged here! A busy year it has been too. Our family of three is now a family of four. OJ now has a baby brother, who is now 3 months old. We also thought we were going to move house back at Eastertime, but the sale on our house fell through. The house we want to buy is still on the market, so all is not lost, but the real estate market seems very slow in our area at the moment.

Some sewing and knitting has been going on, although not a great deal. I found I was very tired throughout my second pregnancy, probably because I was chasing around after a lively toddler all day. By the time OJ was in bed, I found I was just too shattered to concentrate on anything other than TV.

I’ll try and blog about the projects I’ve done over the next few days and catch up a bit. In the meantime, our garden is looking beautiful at the moment. We finally finished landscaping it, in time to sell!

FO: Whitewashed Cottage Layers of Charm Quilt

Well it didn’t get finished in time for my visitors’ arrival back in the Spring, but it’s finally done now!

Here’s the Layers of Charm Quilt, made using a Whitewashed Cottage layer cake by 3 Sisters for Moda Fabric.

whitewashed-cottage-layers-of-charm-quilt

The Layers of Charm Quilt is a free pattern from US fabric retailer Fat Quarter Shop. It requires one layer cake and one charm pack plus additional fabric for backing and binding.

It should have been quite a quick quilt to make, but I had quite a long hiatus between finishing the quilt top and actually quilting it. I have to admit I’m not a fan of the quilting part of the process. I’m never very happy with the outcome and therefore never very motivated to get on with it.  A couple of weeks ago, I decided to put my head down and try and get it finished and whilst baby was napping, I managed to get a few blocks quilted and my Mum kindly did the last half dozen for me the next day, just so it was done! I enjoy the binding part and that only took me an evening to get that stitched.

The Whitewashed Cottage fabric collection is quite an old one now but goes perfectly with the colour scheme in my spare room.

Meet Simon the Sheep

This is Simon the Sheep… a little crocheted friend for my little boy. I had originally intended to crochet a black sheep, as Baa Baa Black Sheep is his favourite nursery rhyme, however I’m only a novice crocheter and using black wool was just too difficult to see the stitches!

simon-the-sheep

The pattern is from a book called Edward’s Menagerie. It’s one that I’ve been meaning to have a go at for AGES but my lack of crochet skills has made me hesitate I suppose. I’ve never been a massive fan of crochet, but I loved making Simon and I’m definitely going to make other animals from the book. My husband requested one some time ago, so I should aim to do another this year.

Putting my feet up!

Well, not exactly. Something a bit different… I recovered a foot stool this week.

footstool

It originally belonged to my grandmother but was showing signs of old age. My Mum said I could have it and recover it to use alongside the chair that I had for my 40th birthday last year.

footstool-and-chair

The fabric was left over from that which my Mum used to recover her dining chairs. She watched some videos and read some blog articles about how to do it and made a fantastic job on the chairs. It’s not quite the same grey as my chair, but I think it still works because of the patchwork nature of the chair.

Baby Mitten Pattern

So my first make of 2018 is off the needles.  With the sudden drop in temperature outside, my baby boy needed some mittens. So I dug out a partly used ball of Sublime Baby Cashmere Merino Silk DK, some DPNs and cast on.  I made up the pattern as I went along.  Fortunately I cast on the correct number of stitches to fit him!

ollie-mittens

The great thing about these is that they were so quick to do.  Here’s the pattern:

  • Using DK yarn and 3.5mm DPNs, cast on 32 stitches.
  • 10 rounds of 1×1 rib.
  • Switch to 4mm DPNs.
  • Knit 20 rounds.
  • Fingertip shaping:
    • K2tog tbl, K12, K2tog, K2tog tbl, K12, K2tog
    • Knit 1 round
    • K2tog tbl, K10, K2tog, K2tog tbl, K10, K2tog
    • Knit 1 round
    • K2tog tbl, K8, K2tog, K2tog tbl, K8, K2tog
    • Knit 1 round
  • Use Kitchener stitch to graft the remaining 20 stitches to close up the mitten.

I estimate this would be 6-12 month size.

My 11th Blog Anniversary

Time for the anniversary blog post. It’s been 11 years since I started writing about my knitting and crafting life.

Last year was a great year as my baby boy arrived in July. I enjoyed the pregnancy (by and large!) and OJ is just a delight to us all. Needless to say, many of my knitting and sewing projects were baby related last year and I’m sure that trend will continue in 2018. In fact I’m currently knitting him a pair of mittens!

Time will no doubt be precious this year, with looking after OJ, running the business (which has now gone back to being Internet only) and having family time, so I’m not sure how much crafting I will achieve.

I do however want to do some modern calligraphy. I was interested in traditional calligraphy many years ago, and now keeping a bullet journal and following journallers on Instagram, my interest has been sparked again in trying some of the more modern types that I’ve seen them use to illustrate their journals.

I also want to do more photography this year. My DSLR camera is in need of repair, but the repair will be so costly and considering the age of the camera, my husband is kindly buying me a new DSLR body for my birthday later this month. I’m very excited!

I WILL finish at least one quilt this too. I’m so close to finishing the whitewashed cottage quilt. In fact we have family coming to stay in March and I am going to aim to finish the quilt before they arrive, because it will look so nice in the guest bedroom!

Here’s to a good 2018!


Baby Boy’s Christmas Snowflake Sweater

I finally finished Baby Boy’s snowflake sweater in time for Christmas! It was a bigger task than originally anticipated because I had to re-knit parts, more than once! I think this was by and large, due to the fact that I chose to use Debbie Bliss Baby Cashmerino, which isn’t quite a DK weight, so I was struggling to get the correct gauge.

When I first started it, I knit the back and part of the front when I realised it wasn’t going to be wide enough. So I frogged and knitted the next size up (in terms of the width) but then decided to stick to the original size for length.

All went quite well until the end when I went to attach the collar.  It wouldn’t fit over his head!  Fortunately I’d had the foresight to not do too much sewing up before I tried it on him. I had to reknit the front piece so that the neck opening was longer.  The collar stretched around the bigger opening fine and now it’s finished it looks and feels really good on him.

Am very pleased with the outcome and it was worth all the re-knitting!

Baby Boy’s Sweater and Jacket

I’ve finished two knits for my Baby Boy this month.

The first is a jacket that I started months ago before he was born.

moss stitch jacket in Sublime Evie yarn
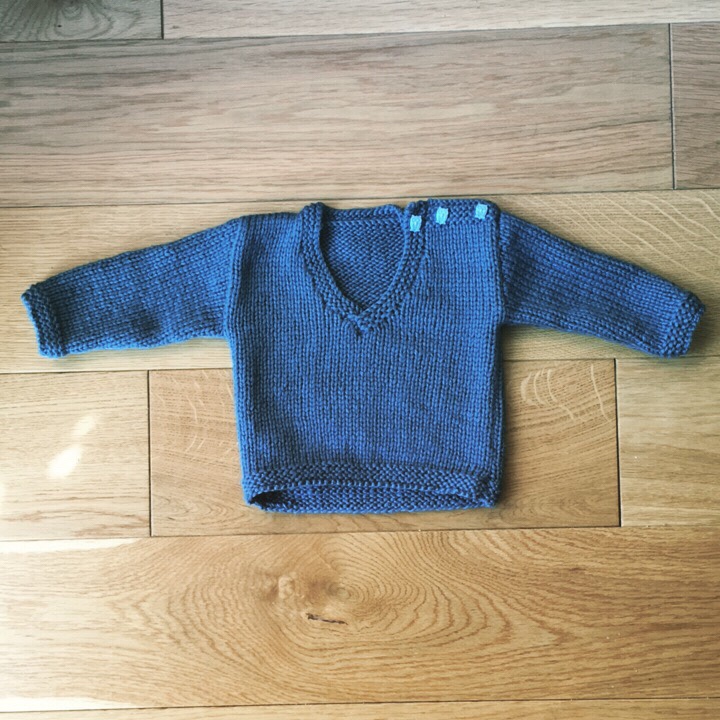
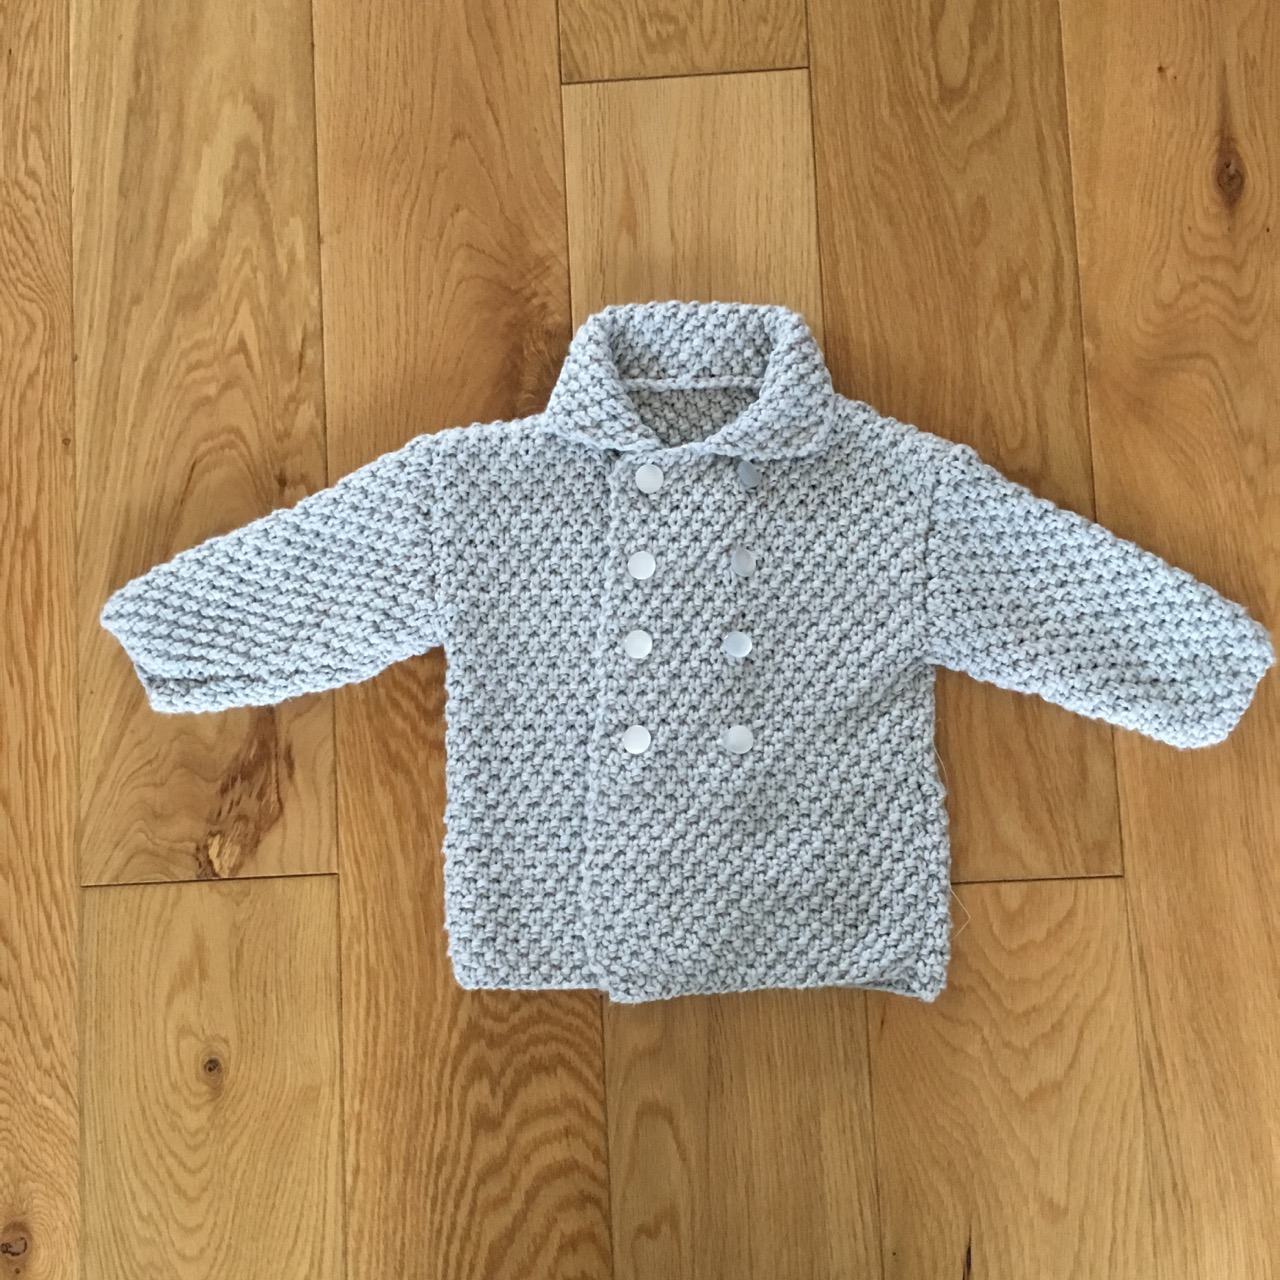
It is knit in Sublime Evie yarn, a cotton/nylon blend which is super soft. It’s been a success as it fits him well and is easy to put on and take off. It was good during the Autumn when he needed a jacket but not necessarily his winter coat.

The second was this v-neck sweater, also knit in Sublime Evie yarn.

Baby sweater knit in Sublime Evie yarn.

Unfortunately, this wasn’t such an immediate success. Somehow I knitted it a bit shorter than the pattern said. This wouldn’t have been long enough anyway, as Baby Boy seems to have quite a long body. So I had to pick up along the cast on edge at the bottom, and knit a few more rounds of garter stitch to lengthen it.

The style and colour really suit him though and he’s worn it several times since I rectified the problem!

Both patterns came from the First Sublime Evie Baby Hand Knit Book (708). The patterns are well written and easy to follow.

SaveSave

Bullet Journalling

I made the big decision last week to close the bricks ‘n’ mortar shop. I’m still operating internet sales, however juggling opening the shop with a new baby just wasn’t working for me or my family. Something had to give.

So now I’m working more from home and having to manage my life a little differently. I used to have a notebook for work stuff, my own personal diary with personal to-do lists, and then in the last few days I started making notes, in another notebook, of baby boy’s feeding and sleeping as I’m starting to try and get him in a routine.

So I’ve decided I’m going to try bullet journalling.  Bullet Journalling is a way of getting your life organised with a notebook of lists. You can read about the original idea here. I came across it some time ago but never tried it.  I will try and get everything into one notebook this way.

I’ve always loved making lists and using notebooks rather than apps etc. I’ve always loved stationary and I used to love my Filofax that I used many years ago. So today I opened a brand new Leuchtturm1917 book, got out a pencil and made a start.

Pinterest is full of inspiration as to layouts, contents and decoration. I think mine will develop as the weeks go on. I’m quite looking forward to it. Is that sad?!

Arm Yarn Holder

I managed to do a spot of sewing a couple of weekends ago. Whilst my parents were having cuddle time with our baby boy, I put together this arm yarn holder.

wrist yarn holder

I’d been knitting at Mum’s recently and was having to balance the ball of yarn on my lap. It kept rolling off and I remembered seeing these yarn holders on Pinterest.

So I did hunt around for some tutorials and patterns and found a few different ideas. I eventually decided to download a yarn bag pattern from this site.  At the full size, it was too big for my needs, however I printed it out at 60% and this brought it down to a much better size.

I didn’t bother with the pocket and I did actually change the curve shaping slightly when I cut it out. Unfortunately I didn’t follow the assembly instructions carefully because I thought I had it in my head but I kept thinking back to a different tutorial I’d read and as a result, ended up mixing up both tutorials and needing to fiddle around to sew it up properly.

But the end result is fine!

The fabric was from our stash and I found this button in the same colour green which I thought would decorate it nicely. (I was originally looking for a knitting themed button I know I have somewhere, but couldn’t find it.)

arm yarn holder